Springboot快速入门 简介:Springboot使你可以非常容器的创建一个独立的、生产级的、基于spring的应用。它大量简化了使用spring带来的繁琐的配置,大部分基于SpringBoot的应用只需要一点点的配置
特征:
访问官网:https://start.spring.io/
确定整个实现步骤
确定整个实现步骤
项目介绍:该项目是使用Springboot框架开发的简单的考勤签到系统,依赖MySql数据库记录数据,能够实现注册、登陆、签到、修改个人信息,查看签到记录等功能
源码地址:考勤签到Springboot项目
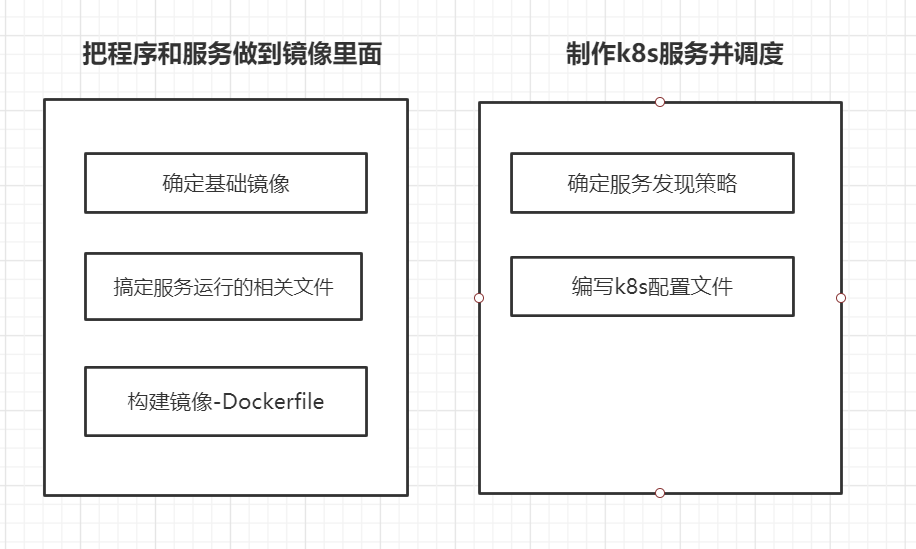
将服务制作成基础镜像 1、该项目基于Java的Springboot框架开发,所以基础镜像使用 openjdk镜像
1 docker pull openjdk:8-jre-alpine
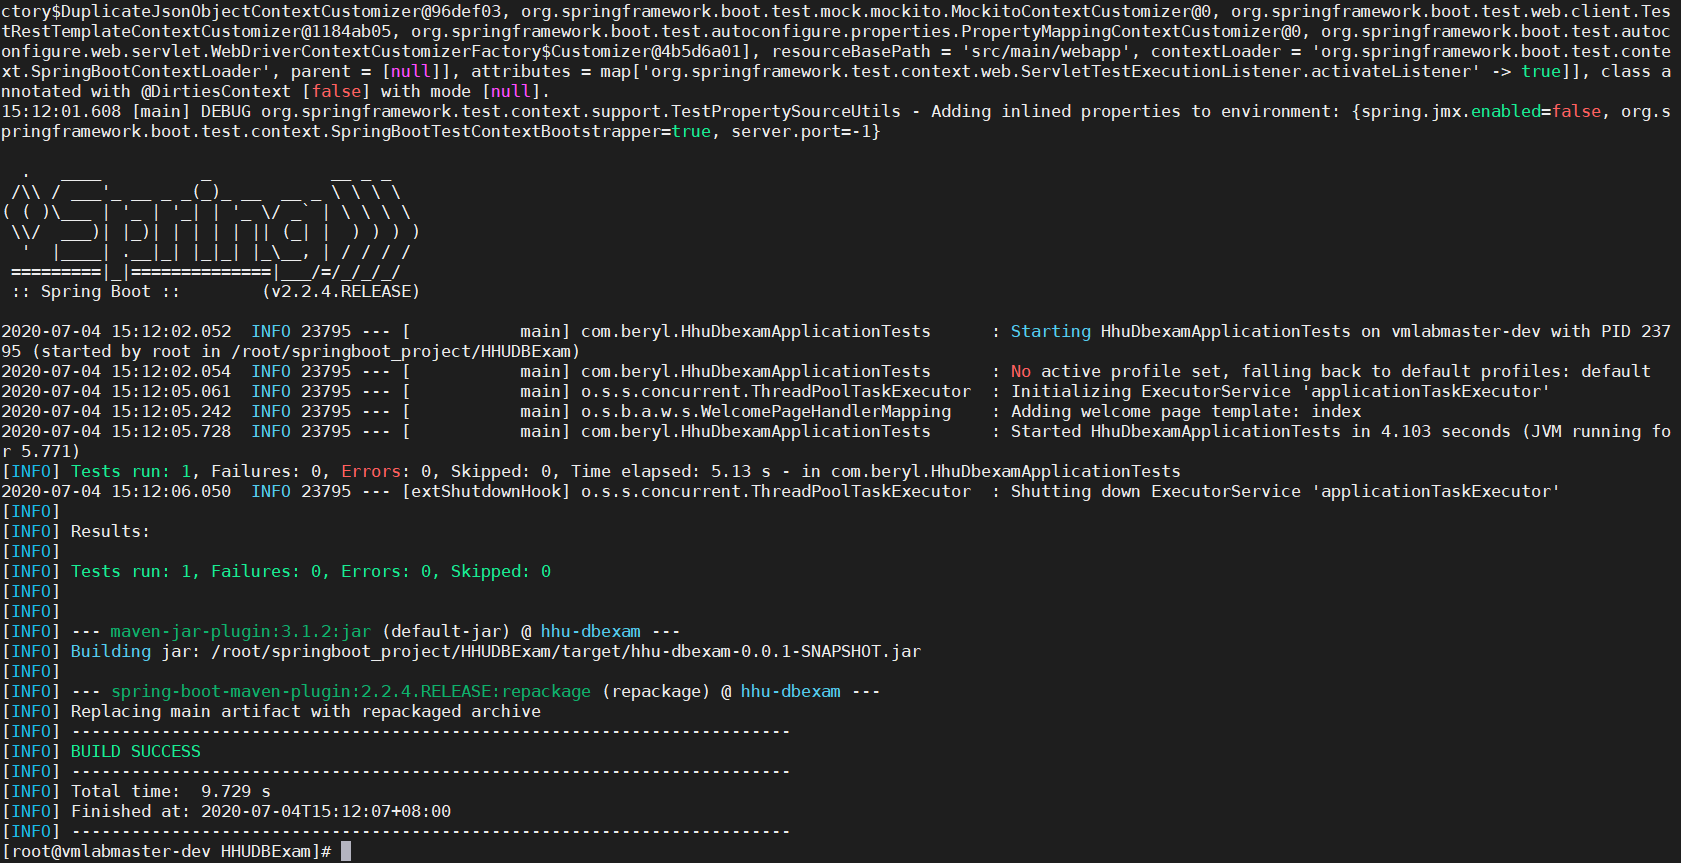
2、使用mvn将该项目打包成jar包,需提前在服务器配置好Java和maven的环境
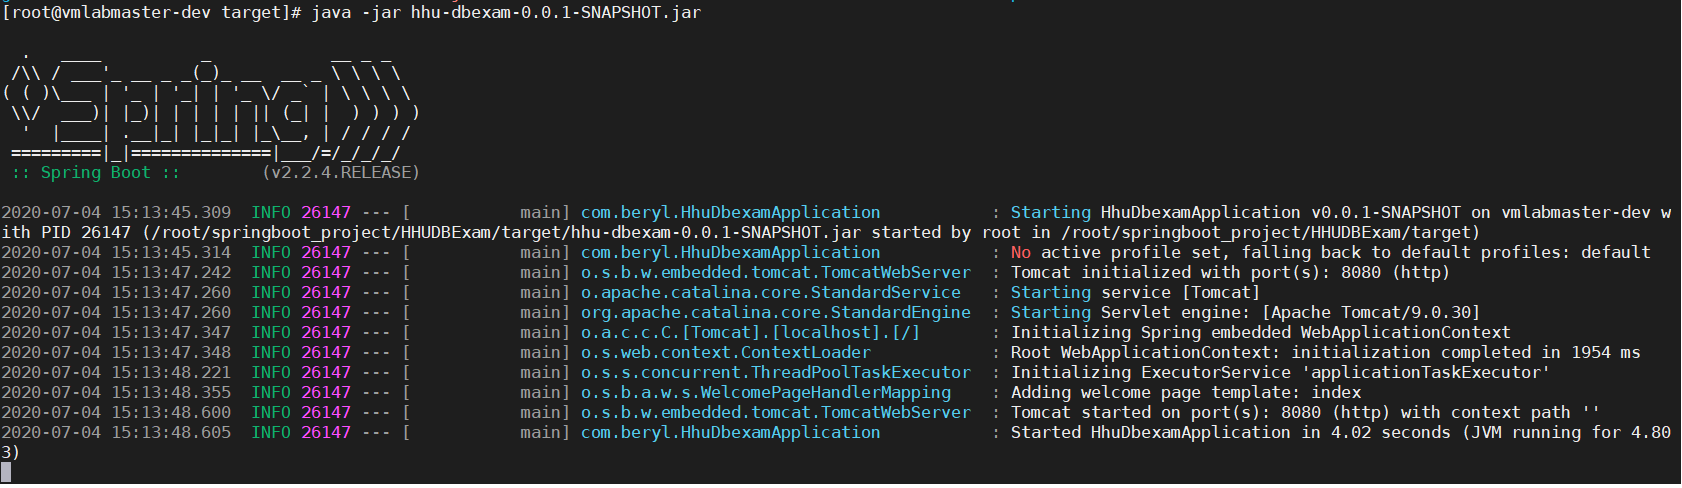
在target/下会生成hhu-dbexam-0.0.1-SNAPSHOT.jar的文件,可以先在本地测试一下
1 java -jar hhu-dbexam-0.0.1-SNAPSHOT.jar
3、使用Dockerfile构建docker,推送到我们的阿里云镜像仓库
1
2
3
4
5
6
$ cat Dockerfile FROM openjdk:8-jre-alpine COPY target/hhu-dbexam-0.0.1-SNAPSHOT.jar /hhu-dbexam-0.0.1-SNAPSHOT.jar ENTRYPOINT ["java","-jar","/hhu-dbexam-0.0.1-SNAPSHOT.jar"] $ docker build -t springboot-web:v1 .
部署依赖服务MySQL 这里也是使用Pod进行部署,但未做数据持久化,下面是mysql-rc.yaml部署文件内容
1
2
3
4
5
6
7
8
9
10
11
12
13
14
15
16
17
18
19
20
21
22
23
24
25
26
27
28
29
30
31
32
33
34
35
36
--- apiVersion: v1 kind: ReplicationController metadata: name: mysql spec: replicas: 1 selector: app: mysql template: metadata: labels: app: mysql spec: containers: - name: mysql image: hub.c.163.com/library/mysql ports: - containerPort: 3306 env: - name: MYSQL_ROOT_PASSWORD value: "123456" --- apiVersion: v1 kind: Service metadata: name: msyql-service labels: app: nginx spec: ports: - port: 3306 targetPort: 3306 selector: app: mysql type: NodePort
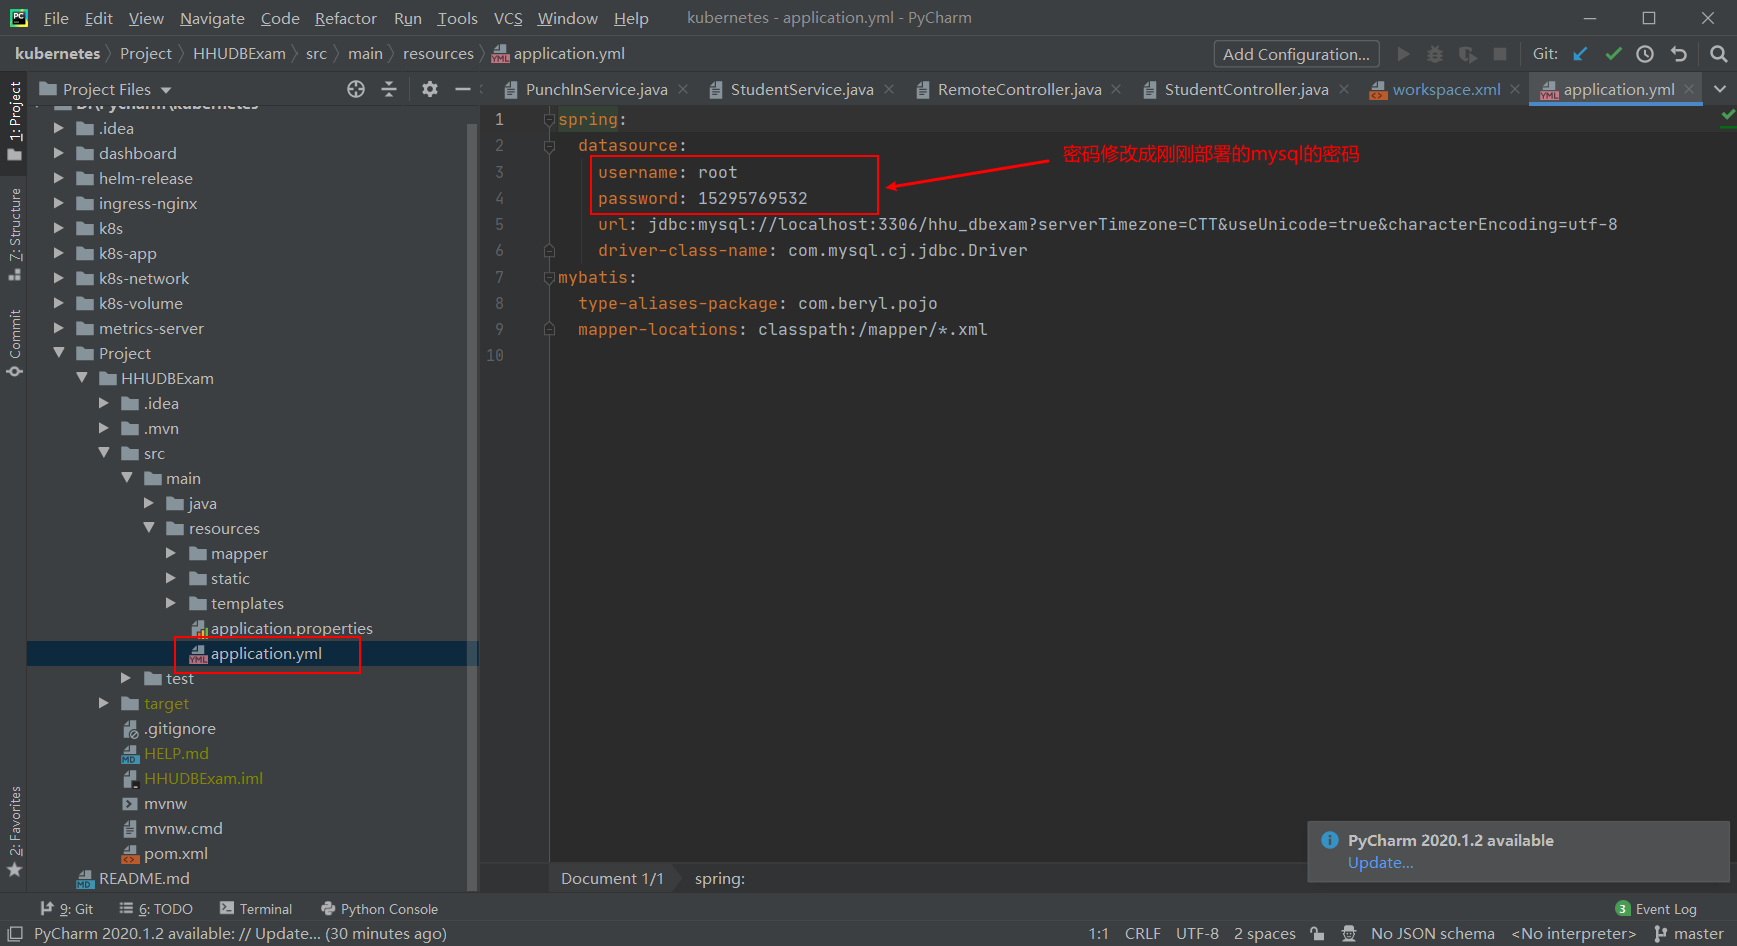
修改代码中链接信息,使其能够连接数据库,url也要对应进行修改
创建对应的数据库和表,添加数据库字段
学生信息表的设计如下:
列名
数据类型
长度
主键
是否非空
id
int
10
yes
yes
stuno
int
20
no
yes
name
varchar
30
no
yes
password
varchar
20
no
yes
classid
varchar
20
no
no
email
varchar
20
no
no
phone
varchar
30
no
no
学生信息表的字段格式说明如下:
序号
学号
姓名
密码
班级
邮箱
电话
01
1706010302
测试
123556
计算机六班
12321@qq.com 1525252
考勤记录表的设计如下:
列名
数据类型
长度
主键
是否为空
id
inr
10
yes
yes
stuno
varchar
20
no
yes
name
varchar
30
no
yes
puch_intimr
datetime
no
yes
考勤记录表的字段格式说明如下:
序号
学号
姓名
签到时间
01
1706010302
测试
2020-04-29 09:27:17
下面是数据库导出的hhu_dbexam.sql文件
1 2 3 4 5 6 7 8 9 10 11 12 13 14 15 16 17 18 19 20 21 22 23 24 25 26 27 28 29 30 31 32 33 34 35 36 37 38 39 40 41 42 43 44 45 46 47 48 49 50 51 52 53 54 55 SET FOREIGN_KEY_CHECKS=0 ;DROP TABLE IF EXISTS `punch_in` ;CREATE TABLE `punch_in` ( `id` int (10 ) NOT NULL AUTO_INCREMENT, `stuno` varchar (20 ) NOT NULL , `name` varchar (30 ) NOT NULL , `puch_intimr` datetime NOT NULL , PRIMARY KEY (`id` ) ) ENGINE =InnoDB DEFAULT CHARSET =utf8; DROP TABLE IF EXISTS `student` ;CREATE TABLE `student` ( `id` int (10 ) NOT NULL AUTO_INCREMENT, `stuno` int (20 ) NOT NULL , `name` varchar (30 ) NOT NULL , `password` varchar (20 ) NOT NULL , `classid` varchar (20 ) DEFAULT NULL , `email` varchar (20 ) DEFAULT NULL , `phone` varchar (30 ) DEFAULT NULL , PRIMARY KEY (`id` ) ) ENGINE =InnoDB AUTO_INCREMENT=5 DEFAULT CHARSET =utf8; INSERT INTO `student` VALUES ('1' , '176815' , '张三' , '123' , '计算机1班' , '9830666999@qq.com' , '17688903055' );INSERT INTO `student` VALUES ('2' , '1111111' , '李四' , '123123' , '1111' , '11111@qq.com' , '17688903066' );INSERT INTO `student` VALUES ('3' , '123456' , '李四' , '123' , '计算机1班' , '888888@qq.com' , '15971488899' );INSERT INTO `student` VALUES ('4' , '111111' , '王五' , '123' , '计算机2班' , '1111@11.com' , '18788899999' );
制作k8s服务并调度 这个项目我们需要使用web界面进行访问,我们使用deploment创建Pod,需要使用NodePort进行暴露或者Ingress域名访问服务
下面是springboot-web.yaml部署文件内容
1
2
3
4
5
6
7
8
9
10
11
12
13
14
15
16
17
18
19
20
21
22
23
24
25
26
27
28
29
30
31
32
33
34
--- apiVersion: apps/v1 kind: Deployment metadata: name: springboot-web spec: selector: matchLabels: app: springboot-web replicas: 1 template: metadata: labels: app: springboot-web spec: containers: - name: springboot-web image: registry.cn-hangzhou.aliyuncs.com/other_ns/springboot-web:v1 ports: - containerPort: 8080 --- apiVersion: v1 kind: Service metadata: name: springboot-web spec: ports: - port: 80 protocol: TCP targetPort: 8080 selector: app: springboot-web type: NodePort
部署上述文件后查看pod和service是否正常运行
1
2
3
4
[root@master-dev HHUDBExam]# kubectl get po |grep springboot springboot-web-67f69d94f5-59wjh 1/1 Running 0 53s [root@master-dev HHUDBExam]# kubectl get svc | grep springboot-web springboot-web NodePort 10.110.69.65 <none> 80:31706/TCP 59s
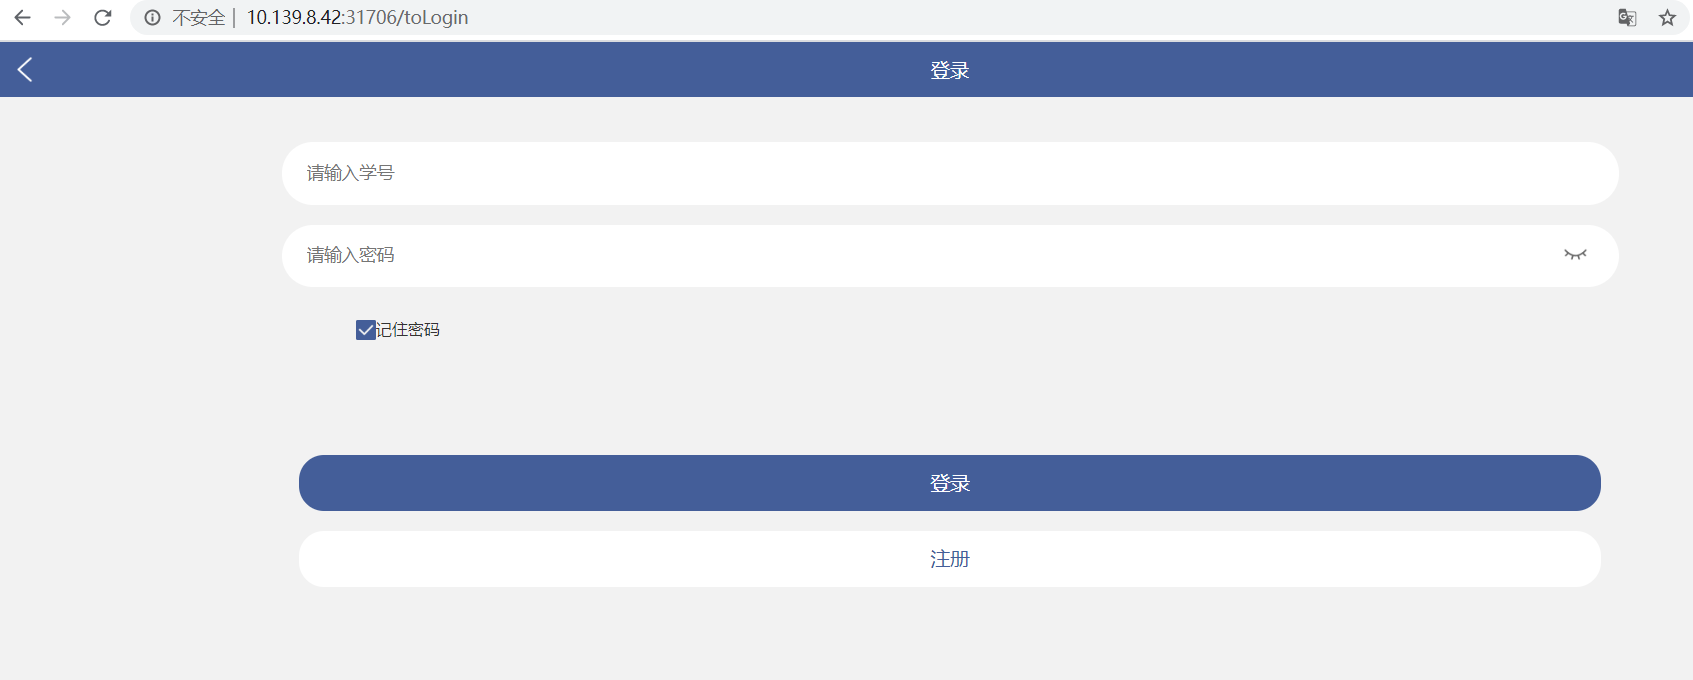
我们访问 http://ip:31706访问我们的服务
至此,我们一个Springboot项目就完成在k8s上面的部署,总结一下流程,先找到基础镜像,在搞定运行的文件,然后将文件打包到镜像里面,最后在k8s上确定调度策略,部署服务。